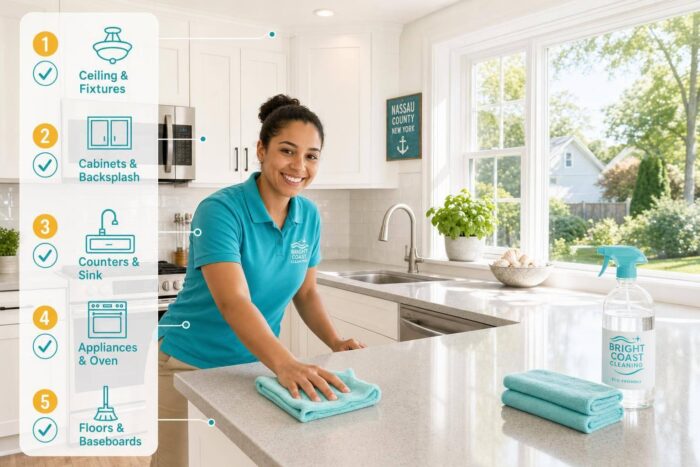
If I want a kitchen deep clean to go faster and come out cleaner, I work top to bottom: grease up high first, floors last. In most Nassau County kitchens, the stove wall, cabinet pulls, sink base, and trash area get dirty first, and grease can build within 2–3 feet of the cooking zone.
Here’s the short version:
- I clear counters, empty the sink, and take out trash first.
- I let oven cleaner and hood-filter soak time do some of the work.
- I clean cabinets, backsplash, counters, sink, trash area, and floors in that order.
- I use degreaser near the stove, but a pH-neutral cleaner on stone or wood.
- I scrub faucet buildup for 2–3 minutes and let degreaser sit 5–10 minutes where grease is thick.
- I treat occupied homes and rental turnovers the same in order, but not in intensity.
- I finish with a reset: dry touchpoints, put back clean items, and for rentals, photograph the result.
The main difference is simple: a lived-in kitchen needs a deep scrub around daily mess, while a turnover kitchen needs an empty, fully wiped reset of cabinets, drawers, and appliance areas.
| Area | Occupied Home | Rental Turnover |
|---|---|---|
| Counters & touchpoints | Daily wipe, deeper scrub as needed | Full sanitize and detail wipe |
| Sink & trash | Daily upkeep, weekly scrub | Full scrub and bin wash every reset |
| Floors | Spot clean often, full mop weekly | Edge-to-edge scrub, including gaps |
| Cabinets | Spot wipe, monthly full clean | Empty and wipe all fronts and interiors |
Bottom line: if I follow the right order, use the right cleaner for each surface, and separate daily upkeep from turnover-level work, the kitchen is easier to reset and less likely to end up with grease, streaks, crumbs, and missed spots.
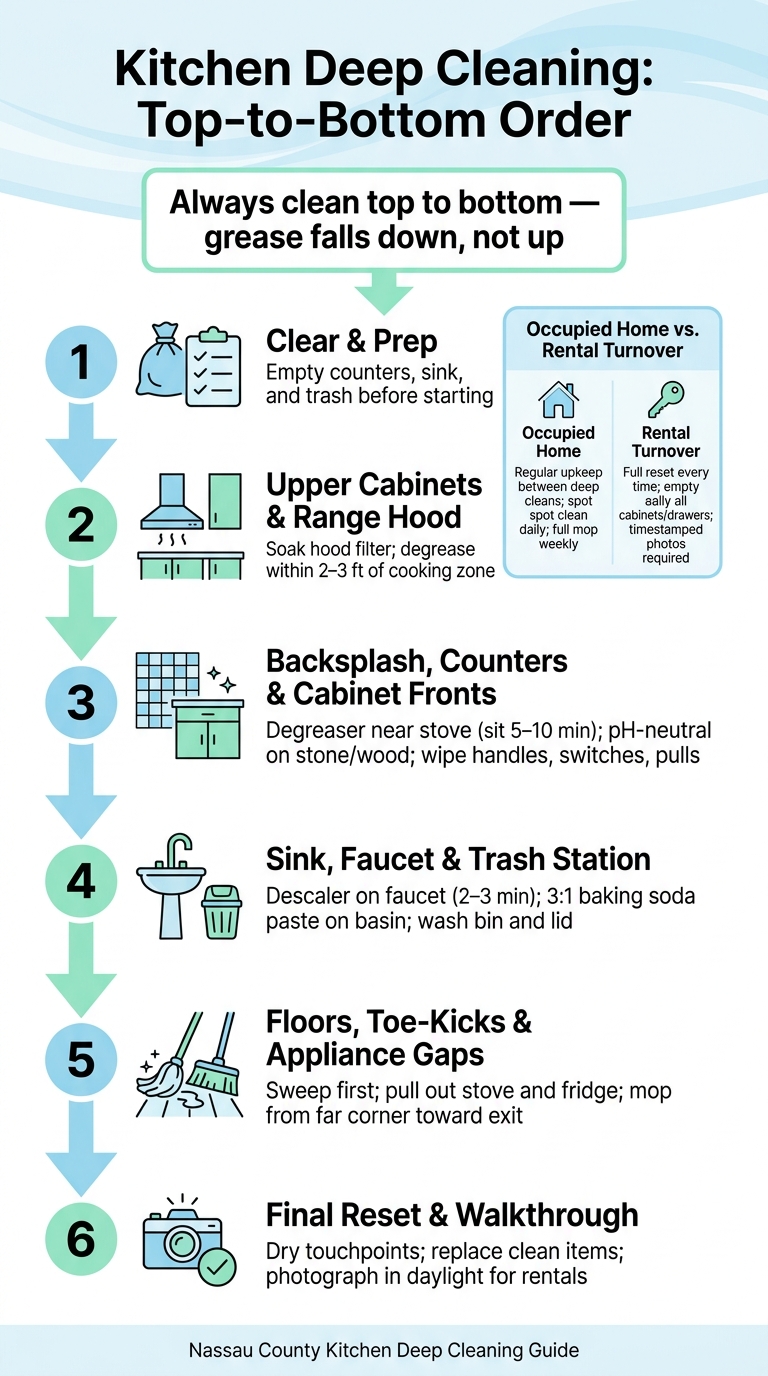
Kitchen Deep Clean Order: Top-to-Bottom Checklist for Nassau County Homes
KITCHEN DEEP CLEAN | Free Checklist for Motivation and Inspiration! SPRING CLEAN WITH ME Part 2
sbb-itb-a8bcf38
Counters, backsplash, cabinets, and touchpoints
After you finish the upper cabinets and stove zone, move across the rest of the mid-level surfaces.
Deep clean countertops and the wall line behind the stove
Clear the counters all the way off first. That gives you room to reach seams, corners, and wall edges where grease likes to build up. Wipe from back to front so crumbs and residue fall off the counter instead of landing on areas you already cleaned.
Start with the strip behind and next to the stove. That spot usually holds the most grease. Apply degreaser, let it sit for 5 to 10 minutes, then wipe [7].
If you have stone counters, switch to a pH-neutral cleaner. Skip vinegar and other acidic cleaners, which can damage the surface.
Clean backsplash tile, grout lines, and painted wall sections
Clean the entire backsplash with degreaser and a stiff brush, with extra focus on the grout lines. The area nearest the range and the section right under the upper cabinets tend to collect the most residue.
For stained grout, use a paste of baking soda and water. It works well without harsh chemicals [1].
Wipe cabinet fronts, drawer interiors, handles, switches, and appliance pulls
Wipe cabinet fronts with cleaner sprayed onto a microfiber cloth, not straight onto wood or painted surfaces. Spraying the surface itself can warp it or cause the finish to peel [7]. Pay close attention to the area right below each handle. That’s where grease often builds up from repeated contact.
Take out any organizers and wipe the drawer corners where crumbs settle. Then clean the kitchen’s main touchpoints:
- Light switches
- Outlet covers
- Door knobs
- Refrigerator pulls
- Oven pulls
- Dishwasher pulls
On stainless steel pulls, wipe with the grain to help avoid streaks and fine scratches.
Next, move to the sink, faucet, disposal, and trash area.
Sink, faucet, disposal, and trash area
Treat the sink area as its own job.
Scrub the sink basin, drain, faucet base, and soap area
Start with the faucet and soap dispenser area, then clean the basin and drain last. That way, any dirty water or residue gets rinsed away at the end [1]. In occupied homes, clean this zone weekly. In turnovers, do it at every reset.
Hard water and grease tend to build up in the small gap where the faucet meets the sink. In older Nassau County homes, hard water stains and mineral deposits show up often, so faucets and sprayers usually need extra care during deep cleans [1]. Apply a descaler, let it sit for 2–3 minutes, then scrub with a soft brush. After that, buff the fixture dry with a microfiber cloth so new water spots don’t show up right away [1].
For the basin, use a paste made with 3 parts baking soda to 1 part water. It works well on stainless steel and porcelain without scratching the surface [7]. Scrub the basin, rinse it well, then dry and polish it with a clean microfiber cloth.
Pay close attention to the underside of the faucet head and the folds of the disposal splash guard. These spots can hold mold and bacteria, and they often get missed during routine cleaning [4]. Run the disposal with ice and lemon to loosen residue and cut odors [3][1]. In occupied homes, sanitize the disposal weekly.
Wipe the soap-bottle area last.
Clean trash and recycling bins, lids, liners, and the floor around them
Once the sink is done, move to the waste station. Empty the bins and replace the liners. Then wash the inside of each bin with a disinfectant cleaner. Wipe the lid, handle, and outside of the bin to remove fingerprints and dried drips [4][5].
This area gets dirty fast. Crumbs, sticky drips, and grease splatter often build up along the baseboards and toe-kicks nearby [1][8]. Wipe the baseboards and mop the floor before putting the bins back. In turnovers, do this at every reset.
Next, finish with floors and the final reset.
Floors, final reset, and cleaning frequency
Sweep and mop floors, corners, toe-kicks, and appliance gaps
After the trash station, finish with the floor. That way, the last bits of dirt end up where you can deal with them.
Start dry. Sweep or vacuum the whole floor before using any liquid, so you don’t smear crumbs and dust around [7][1]. Run the broom into corners, along baseboards, and into the toe-kicks, those recessed spaces under cabinets. They tend to hold splashes and kicked-up debris [1][8].
Pull the stove and refrigerator out and clean the floor underneath and along both sides. Those spots often collect grease and crumbs [1][4]. Once the loose dirt is gone, spray a neutral pH cleaner on sticky high-traffic areas and let it sit for 2–3 minutes before mopping [1][6]. Mop from the farthest corner and work toward the exit, so you don’t step back onto wet sections [1][6][4].
Final reset for occupied homes and turnover-ready kitchens
After the floor dries, do one last walkthrough.
For occupied homes, put back only clean items on the counters, like toasters, coffee makers, and anything else moved during cleaning. Check that touchpoints such as cabinet handles, light switches, and appliance pulls are dry, since wet surfaces streak and pick up new fingerprints fast [2][7]. Make sure the liner is secure and the floor edges are clear [8][3].
For rental turnovers, the bar is stricter. Every cabinet, drawer, and appliance interior needs to be empty and wiped out, and anything left behind can lead to disposal fees [3]. If you can, do the last walkthrough in daylight. Natural light shows streaks and missed spots that indoor lighting can hide [3]. Take timestamped photos of every area after cleaning.
Cleaning schedule: busy households vs. rental turnovers
The tasks stay the same whether you’re caring for a family kitchen or turning over a rental. What changes is the pace and the level of detail.
| Task | Busy Household | Rental Turnover |
|---|---|---|
| Counters & Touchpoints | Daily wipe and disinfect | Deep scrub and sanitize |
| Sink & Trash Area | Daily rinse and empty; weekly scrub | Sanitize basin, drain, and bin interior |
| Floors | Weekly full mop; daily spot clean | Detail scrub including edges, gaps, and toe-kicks |
| Backsplash | Weekly wipe; monthly degrease | Full degrease and grout scrub |
| Cabinet Fronts | Weekly spot wipe; monthly full wipe | Detailed scrub and polish |
| Cabinet Interiors | Monthly (pantry); seasonal (all) | Empty and wipe all shelves and drawers |
Conclusion: A straightforward kitchen deep cleaning plan for Nassau County homes
Now that the checklist is done, the next move is simple: decide how often your kitchen needs this kind of top-to-bottom cleaning.
This approach works for a reason. You clean from high to low, so dust and debris fall onto areas you haven’t finished yet. That helps you avoid re-soiling surfaces you already wiped down.
In lived-in homes, kitchens need regular upkeep between deep cleans. In turnovers, the job is more of a full reset every single time. For rental turnovers, empty and wipe every cabinet and drawer, clean appliances inside and out, and document the finished kitchen with before-and-after photos [3]. Dirty appliances can trigger move-out charges.
If your kitchen needs a reset, or a turnover date is coming up, getting help can cut down the time spent on the most detailed parts of the job. For Nassau County kitchens that need that kind of reset, NLZ Cleaning Long Island offers standard, deep, and move-out cleaning across towns like Garden City, Great Neck, Massapequa, and Rockville Centre.
FAQs
How long does a kitchen deep clean usually take?
The time mostly comes down to two things: the size of the kitchen and how much grease and grime has built up.
For an average-sized kitchen, a full top-to-bottom deep clean usually takes 2 to 4 hours.
If the space hasn’t been deep cleaned in several months, it’s smart to set aside an extra 30 to 60 minutes. That extra time usually goes toward tougher grease, stuck-on residue, and the kind of mess that doesn’t come off in one pass.
As part of a full-home deep clean, the kitchen often takes up a big share of the total job, which usually runs 4 to 8 hours.
What cleaners are safest for stone, wood, and stainless steel?
Use food-safe all-purpose cleaners the right way so they don’t leave residue behind. And when you’re cleaning stainless steel, stick with non-scratch options like baking soda.
Spray cleaner onto a microfiber cloth instead of directly onto wood or finished cabinet fronts. That small step can help prevent warping or peeling. After cleaning, dry stone and other finished surfaces all the way. For stainless steel sinks and faucets, apply all-purpose cleaner with a damp cloth, then dry the surface to help stop water spots.
How often should I deep clean a busy kitchen?
For a busy kitchen, plan a thorough deep clean every 1–2 months. If you cook a lot, deal with heavy grease, or notice odors or grime that stick around after your usual cleaning, do it sooner.
Daily wipe-downs and weekly upkeep make a big difference. They help stop the kitchen from getting tougher to clean between deep cleans. If it’s been several months since the last deep clean, set aside extra time for built-up grime.