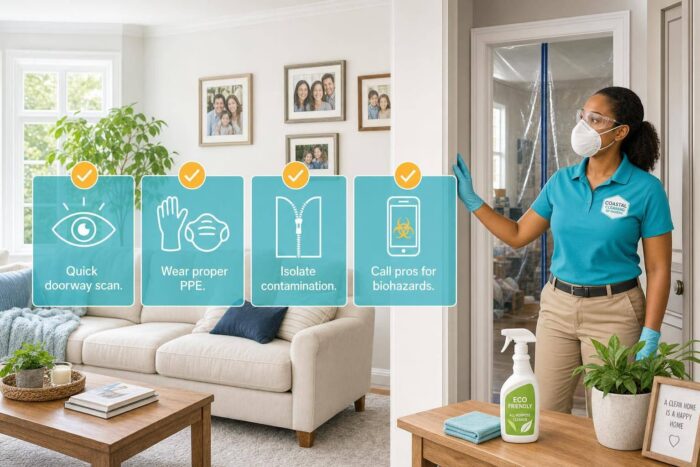
If you see waste, needles, mold, pests, blocked exits, or sagging floors, stop and stay out. That’s the main point.
I’d use this checklist to make one fast call before cleanup starts: Is this room safe, risky, or off-limits? The article breaks that down room by room, shows what PPE to wear, explains how to sort items without blocking exits, and shows when I should stop DIY work and call a pro.
Here’s the short version:
- Start with a 10–15 minute doorway scan of each room
- Check exits first: doors, hallways, stairs, and access to the electrical panel
- Wear PPE before touching anything: gloves, N95, eye protection, long sleeves, pants, and sturdy shoes
- Do not enter rooms with structural damage, waste, sharp medical items, strong chemical or sewage odors, or heavy pest activity
- Open one room at a time and keep one clear walking path
- Set up sorting zones: Trash, Donate, Keep, Hazard, and Unsure
- Keep kids and pets out of the work area
- Call the right pro for mold, pests, wiring, structural damage, or biohazards
A key detail: if even one high-risk issue shows up, the room is no longer a DIY cleanup. Also, if I feel dizzy, short of breath, or sick, I leave at once.
Quick view
| Area | What I check first | When I stop |
|---|---|---|
| Doorway | Blocked exit, leaning piles, soft floor, odors | If access is not clear |
| Kitchen/Bath | Rotten food, water, waste, pests, mold | If contamination has spread |
| Bedroom/Living room | Paths, sharps, overloaded outlets, heater clearance | If paths are blocked or sharps are present |
| Basement/Attic | Damp boxes, droppings, wiring, unstable stacks | If stacks may fall or wiring is damaged |
| Stairs/Exits | Full access, railings, treads, doors opening fully | If any exit is blocked |
In short, I’d treat this article as a safety filter first and a cleanup plan second.
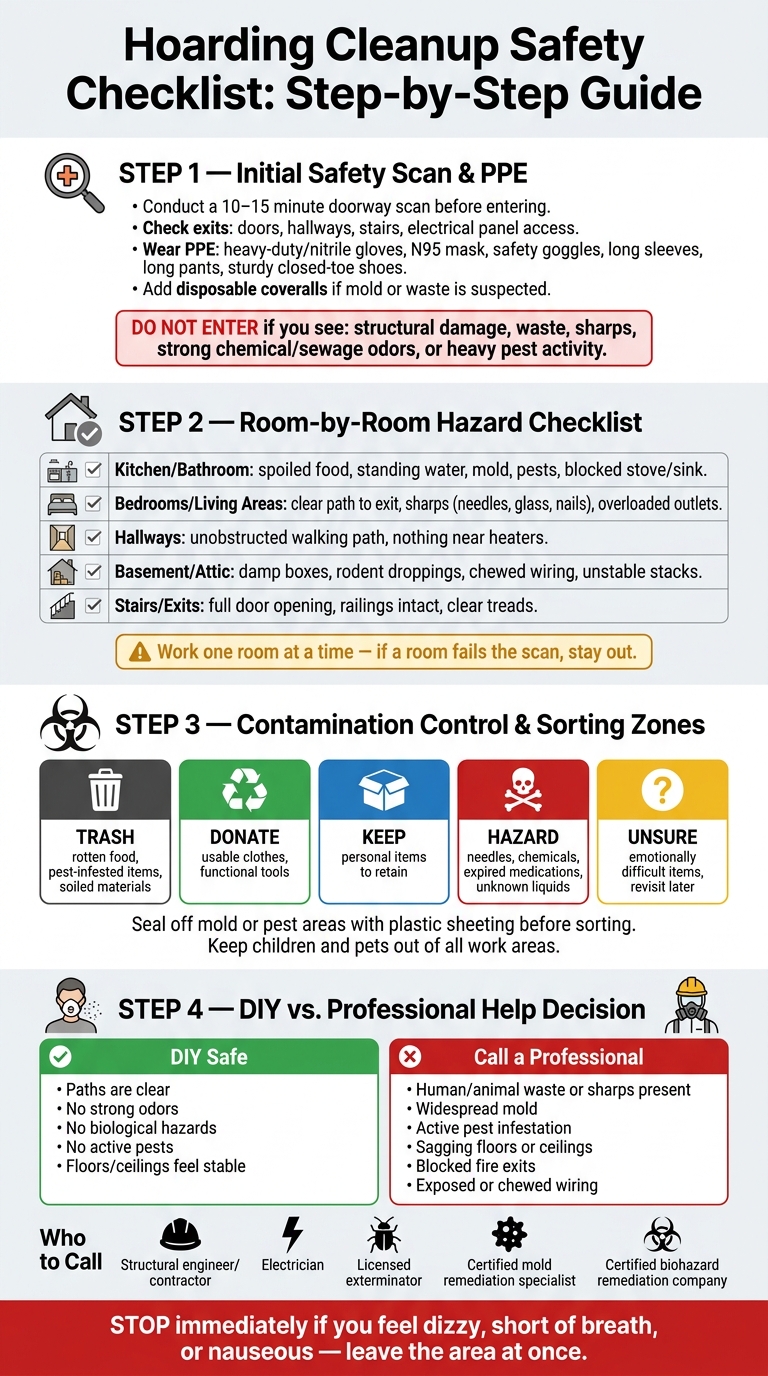
Hoarding Cleanup Safety Checklist: Step-by-Step Guide
Step 1: Initial safety scan and protective gear
Doorway scan: exit access, trip hazards, and unsafe rooms
Start at the doorway. Before you touch a single item, check for blocked exits, loose cords or rugs, leaning stacks, damp or soft flooring, exposed wiring, overloaded outlets, and anything blocking access to the electrical panel.
Go one room at a time. If a room fails this scan, stay out. Don’t try to push through and “deal with it later.” That’s how people get hurt.
If the room passes the scan, put on PPE before moving anything.
Gloves, masks, eye protection, and clothing that limit exposure
Put on PPE before touching anything. Wear heavy-duty or nitrile gloves, an N95 mask or respirator, safety goggles, long sleeves, long pants, and sturdy closed-toe shoes with good grip [2][5].
If mold, waste, or other contamination seems likely, add disposable coveralls. It also helps to set up a clean area for putting on and removing PPE, so you don’t track contamination into clean spaces [2].
Only then should you begin sorting and removal.
When to stop and stay out of a room
Use the scan to sort rooms into safe, caution, or off-limits.
| Hazard | Warning Signs | Action |
|---|---|---|
| Structural | Sagging floors, soft spots, widening cracks, leaning piles supporting walls or ceilings | Stop DIY; call a structural professional [5][2] |
| Biohazard | Human or animal waste, urine, used needles, medical waste, bodily fluids | Do not enter; contact biohazard remediation [5][6] |
| Fire/Electrical | Sparking outlets, paper or debris near heaters, overloaded outlets, blocked electrical panels, blocked exits | Clear exits first; call an electrician for sparking [5] |
| Environmental | Strong ammonia, sewage, or chemical smells; widespread mold | Stop DIY; use professional remediation [5][2] |
| Pests | Active movement in piles, heavy droppings, nests | Pause; involve pest control before disturbing piles [5] |
Leave right away if you feel dizzy, short of breath, nauseous, or panicked [5].
sbb-itb-a8bcf38
Step 2: Room-by-room hazard checklist
Use the doorway scan from Step 1 to figure out which rooms are safe to open first. Then move through the home one space at a time. That pace matters. Each room comes with its own set of risks, and jumping ahead can hide problems you don’t see until it’s too late.
Kitchen and bathrooms: food waste, standing water, mold, and pests
Start with the kitchen. Check for spoiled food, standing water, blocked access to the stove or sink, and signs of pests like roaches, rodents, or flies. If the stove or sink is blocked, leave the room until you can get clear access.
Bathrooms need the same kind of careful look. Make sure the toilet, sink, and tub or shower can all be reached. Check for feces, urine, mold, and contaminated toiletries. If waste or mold has spread through the room, stop there and bring in professional help.
Bedrooms, living areas, and hallways: clutter, sharps, and blocked paths
In bedrooms, clear a path from the bed to the exit first. Then check under the bed and around closets for sharps such as broken glass, rusty nails, or used needles.
Living areas and hallways need to stay open because they control movement through the rest of the home. Look for anything that narrows the walking path, paper near heaters, and overloaded electrical outlets. If a hallway or doorway is blocked, clear that area before doing anything else.
Basements, attics, and storage areas: dampness, wiring, and falling items
Basements, attics, and storage areas often hide some of the biggest problems. Look for damp boxes, hidden mold colonies, rodent droppings, chewed wiring, leaking pipes, and stacked items that could shift or collapse. Move slowly. Don’t disturb stacked items until they’re stable.
Entryways, stairs, and exits: safe access in and out of the home
Entryways and stairways are the highest-priority areas in any hoarding cleanup. Make sure there’s a continuous walking path and that nothing blocks doors, stairways, or emergency windows. Check stair treads, landings, and railings for clutter, loose items, or damage. If any door can’t open fully, stop and clear it first.
After the safest access points are clear, move to containment and disposal planning.
Step 3: Contamination control and disposal planning
After you clear each room, stop cross-contamination before you start sorting or moving anything. Keep dirty areas separate from clean staging areas. That one step can save you a lot of extra cleanup later.
Pest signs, mold spots, and biohazard areas to isolate right away
If you spot active pest activity or notice a musty smell along with visible mold, seal off that area with plastic sheeting before doing anything else. Don’t keep working around it and hope for the best.
Treat waste, blood, urine, and heavy contamination as biohazards. Gloves and household cleaners are not enough. Seal the room, and don’t carry items through clean areas.
Sorting stations and disposal categories that keep exits clear
Set up five labeled zones in one clear, easy-to-reach space: Trash, Donate, Keep, Hazard, and Unsure. The Unsure zone helps you keep moving when an item feels emotionally hard to deal with. Instead of getting stuck, you set it aside and come back later.
Try to handle each item once, then move it straight to its final zone.
| Category | What Goes Here | Where It Goes |
|---|---|---|
| Trash | Rotten food, pest-infested items, soiled materials | Dumpster rental or municipal waste |
| Donate | Usable clothes, functional tools, matched sets | Remove from the property within 24–48 hours [5] |
| Hazard | Needles, syringes, lancets, chemicals, expired or unlabeled medications, unknown liquids | Sharps containers for needles; county hazardous waste programs for chemicals and medications [2][5][6] |
| Contaminated debris | Moldy drywall, heavily soiled building materials | Licensed disposal facility via a permitted transporter [6][3] |
| Biohazard | Feces, urine, animal remains | Licensed disposal facility via a permitted hazardous-waste or medical-waste program [6][3] |
| Unsure | Items causing emotional distress or uncertainty | Temporary hold zone; revisit later [5] |
In New York, regulated medical waste – including sharps and blood-contaminated items – cannot go into a standard trash bag or municipal bin [6]. Filled bags should go out of the home right away so walkways and exits stay open.
Keeping children and pets safe during cleanup
Keep children and pets in a separate supervised space away from the cleanup area. Don’t let them come back in until sorting and disposal are done.
When piles get disturbed, they can release spores, pathogens, and pests [1][3]. If you can’t isolate the contamination safely, stop here and move to Step 4.
Step 4: DIY cleanup or professional help – how to decide
Steps 1–3 show what hazards are in the home. This step helps you decide who should handle them.
The key is simple: make the call based on safety, not how hard the job looks. A room may seem manageable at first glance, but one high-risk issue can turn it into professional-only work.
Low-risk cleanup vs. high-risk conditions
Use this table to sort each room into DIY work or cleanup that needs a specialist.
| Condition | Low-Risk (DIY) | High-Risk (Professional) |
|---|---|---|
| Clutter level | Rooms usable, paths clear | Rooms unusable, narrow paths only |
| Sanitation | Generally clean, no strong odors | Human or animal waste, rotting food, strong odors |
| Exits | All exits and hallways accessible | Blocked fire exits, stairways, or electrical panels |
| Biological hazards | No needles, blood, or major mold | Sharps, bodily fluids, widespread mold |
| Pests | No active infestation | Visible roaches, rodents, or droppings |
| Structural integrity | Floors and ceilings feel stable | Sagging floors or ceilings under clutter weight |
Stop at once if you find human or animal waste, used needles, or signs of structural instability.
And here’s the rule that matters most: if any one item lands in the high-risk column, stop sorting. Don’t push through it. Match that hazard to the right specialist instead.
Who to call for specific hazards
When you check credentials, don’t settle for a vague “biohazard certified” claim. Ask for proof of OSHA compliance, a respiratory protection program, and licensed waste transport permits [6].
Here’s who to call for each type of hazard:
- Structural problems such as sagging floors, ceilings, or piles acting as support: licensed contractor or structural engineer [5][1]
- Exposed or chewed wiring: electrician [1]
- Active pest infestation: licensed exterminator. Pause cleanup before calling, because moving debris can spread pests farther [5][1]
- Widespread mold or mold embedded in drywall: certified mold remediation specialist [5][4]
- Biohazards such as feces, urine, blood, sharps, or decomposition: certified biohazard remediation company with proper transport permits [6]
Conclusion: Know when to stop and bring in help
Start with a doorway scan. Keep one clear exit, wear PPE, and sort items into labeled zones before you move anything. If the room doesn’t pass that first check, stop and stay out.
End DIY cleanup right away if you find feces, urine, used needles, widespread mold, active pests, blocked exits, sagging floors or ceilings, or if you start to feel dizzy, nauseous, or short of breath.
After professional remediation, Nassau County homeowners can schedule standard follow-up cleaning with NLZ Cleaning Long Island – Nassau County’s Top-Rated Home Cleaning Service.
FAQs
How do I know if a room is too dangerous to enter?
Before you move anything, do a safety check first. If you notice any of the following, stop and contact professionals:
- Structural instability, such as sagging floors, soft spots, or stressed walls
- Biohazards, including human or animal waste, needles, sharps, or decomposing matter
- Widespread mold, strong odors, active pests, or blocked exits, hallways, or electrical panels
If you feel physically unsafe at any point, stop immediately.
What PPE is most important for hoarding cleanup?
The most important PPE for hoarding cleanup is respiratory protection along with full barrier protection.
Use an N95 or P100 respirator, heavy-duty double gloves, safety goggles, and disposable full-body coveralls. This gear helps reduce inhalation and skin or eye exposure to dust, mold, and biohazards.
When should I stop DIY cleanup and call a pro?
Stop DIY cleanup and call a professional right away if you find biohazards like human or animal waste, medical sharps, or raw sewage.
The same goes for pest infestations, structural damage like sagging floors or ceilings, and mold that’s widespread or buried deep in walls, flooring, or other materials.
And if you start to feel dizzy or have trouble breathing, stop immediately. Do the same if the legal, safety, or mental health side of the situation is more than you can handle on your own.