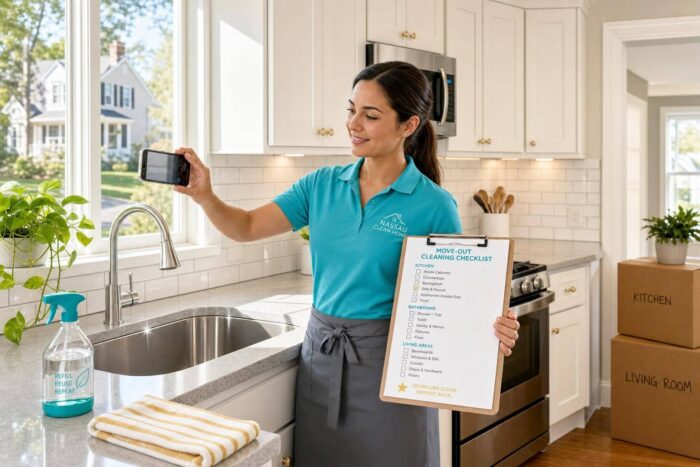
Your security deposit can disappear fast over missed cleaning details. In New York, a landlord must return your deposit or send an itemized deduction list within 14 days after move-out, and cleaning charges like a dirty oven, moldy grout, or stained carpet can cut $50 to $300+ at a time.
If I wanted the best shot at getting my money back, I’d focus on four things:
- Check the lease first for move-out rules like carpet cleaning or a broom-clean clause
- Fix small issues before cleaning like dead bulbs, anchor holes, drain clogs, and moldy caulk
- Clean after the unit is empty, room by room, from top to bottom
- Document everything with timestamped photos, video, receipts, and a walkthrough record
Here’s the short version: kitchens and bathrooms get the most scrutiny, hidden spots matter, and anything left behind can cost you. Normal wear and tear usually isn’t chargeable, but dirt, neglect, and damage often are.
A few places I’d pay extra attention to:
- Oven, stovetop, and hood
- Refrigerator shelves, drawers, and seals
- Cabinet and drawer interiors
- Bathroom grout, caulk, toilet base, and fan cover
- Baseboards, blinds, window tracks, and vents
- Closets, entryways, and outdoor areas
- Keys, fobs, remotes, and trash removal
| What matters most | What to do |
|---|---|
| Lease rules | Review cleaning and repair terms before move-out |
| Timing | Start repairs 3–5 days early, then deep clean once the unit is empty |
| High-risk areas | Scrub kitchen appliances, bathroom buildup, carpets, and hidden dust spots |
| Deposit proof | Take photos, record video, save receipts, and provide a forwarding address |
The bottom line: if I clean the unit like an inspector will check it, fix small problems before they get flagged, and keep proof of the condition I left behind, I put myself in a much better spot to recover my deposit.
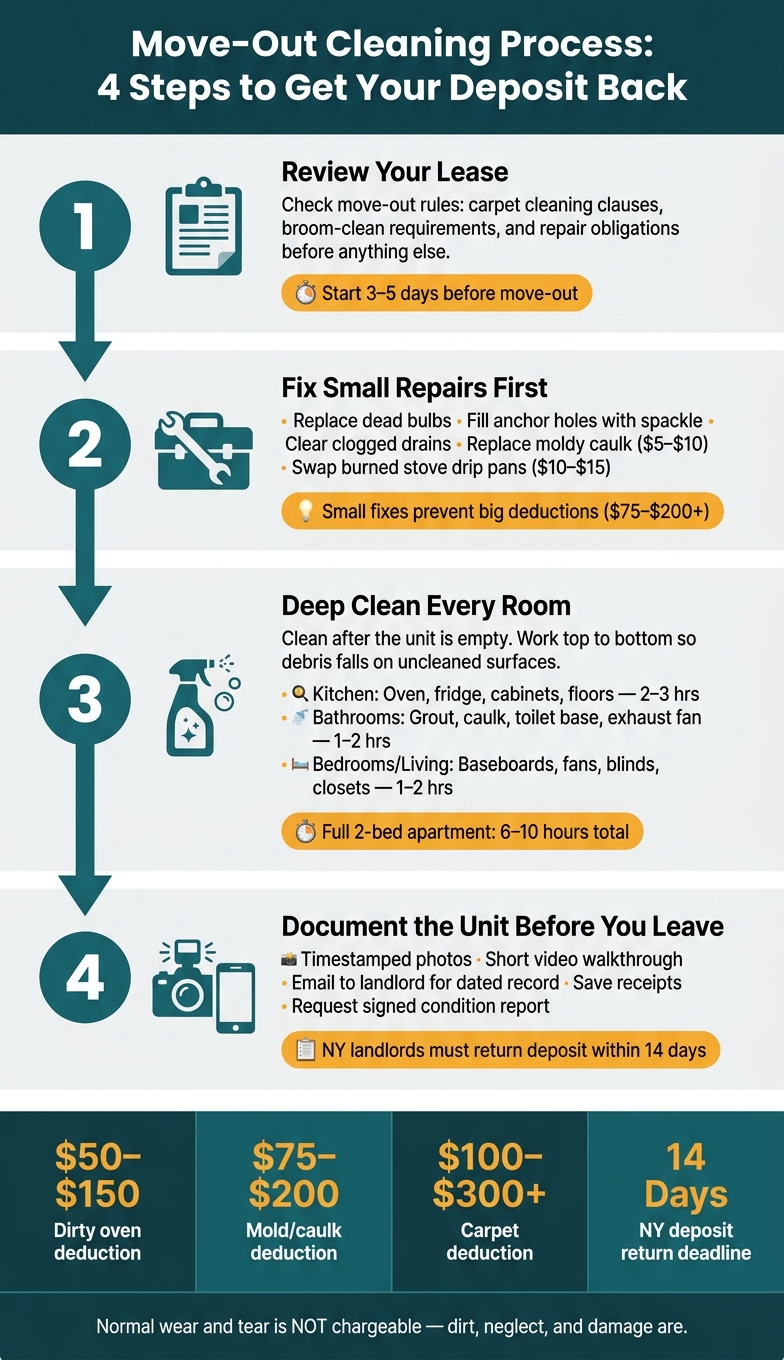
Move-Out Cleaning Process: 4 Steps to Get Your Deposit Back
Move Out Cleaning Like a Pro! | Get your Damage Deposit Back!
sbb-itb-a8bcf38
Pre-Move-Out Checklist: Repairs, Supplies, and Inspection Prep
Start repairs and packing 3–5 days before move-out. Save the final deep clean for after the unit is empty. That order matters. If you clean too early, you’ll just end up doing parts of it again.
Take care of small fixes before you start cleaning:
- Replace dead light bulbs
- Clear clogged drains so water runs as it should
- Test smoke and carbon monoxide detectors, and swap in new batteries if needed
- Remove nails, hooks, and adhesive strips
- Small picture-hanging nail holes are often treated as normal wear and tear, but larger holes or wall-anchor damage should be filled with spackle
- Wipe light wall scuffs with a damp cloth or Magic Eraser
A couple of low-cost fixes can save you money. If bathroom caulk is moldy and won’t come clean, replace it. A tube usually costs $5–$10, while a deduction could run $75–$200 [2]. The same goes for badly burned stove drip pans. A new set is about $10–$15, which is a lot better than losing part of your deposit over neglect [2].
Once repairs are done, clean room by room so you don’t backtrack. It’s faster, and it helps you avoid that last-minute chaos where one cleaned space gets dirty all over again.
Cleaning vs. Damage: What Can Cost You Your Deposit
Not every issue in a rental can be charged to you. In most cases, normal wear and tear isn’t your bill to pay. Damage, neglect, and items left behind usually are.
| Issue | Action | Deposit risk? |
|---|---|---|
| Faded paint or worn carpet | None (normal wear and tear) | No |
| Minor wall scuffs | Wipe with a damp cloth or Magic Eraser | No |
| Large holes or anchor damage | Fill with spackle and sand | Yes |
| Dirty oven or refrigerator | Deep clean interior and exterior | Yes |
| Moldy bathroom grout/caulk | Scrub with bleach or replace caulk | Yes |
| Broken fixtures or dead bulbs | Replace or repair | Yes |
| Personal items or trash left behind | Remove everything before move-out | Yes |
That line between used and damaged is where deposits often get chipped away. A worn carpet from normal living is one thing. A filthy oven or wall full of anchor holes is another.
Supplies to Have Ready Before the Final Clean
Before you start the final clean, get everything in one place. It sounds basic, but it keeps the job moving and saves you from stopping every ten minutes to hunt down a sponge or batteries.
- Cleaning agents: All-purpose cleaner, heavy-duty degreaser, bathroom/tub cleaner, toilet bowl cleaner, glass cleaner, oven cleaner or baking soda paste
- Tools: Microfiber cloths, sponges, scrub brush or old toothbrush, toilet bowl brush, mop and bucket
- Equipment: Vacuum with brush attachments
- Repair supplies: Spackle and putty knife, touch-up paint if available, replacement light bulbs, fresh batteries
- Miscellaneous: Heavy-duty trash bags, protective gloves, smartphone or camera for documentation
Keep your supplies ready before you begin so the final clean doesn’t get interrupted. With repairs done and your gear set out, move into the kitchen first.
Room-by-Room Move-Out Cleaning Checklist
With repairs finished and supplies on hand, clean each room from top to bottom. That way, dust and debris fall onto surfaces you haven’t cleaned yet instead of making you do the same job twice. A good rule of thumb is 2–3 hours per room. For a 2-bedroom apartment, the full job often takes 6–10 hours.
Kitchen: Appliances, Cabinets, Counters, and Floors
Kitchens are one of the biggest trouble spots during move-out. Inadequate cleaning of kitchens and appliances is one of the most common reasons for security deposit deductions, not physical damage [5]. And the charges add up fast: a dirty oven alone can cost $50–$150, while a neglected refrigerator can lead to another $50–$100 [2].
Start with the oven since it usually needs time to sit. Apply cleaner and let it dwell for at least 20 minutes. If there’s heavy buildup, leave it overnight. Then scrub the interior walls, racks, and broiler pan.
For the refrigerator, take out every shelf and drawer and wash them in warm soapy water. Use an old toothbrush to clear debris from the rubber door gaskets. After that, wipe the exterior and clean behind and underneath any movable units.
Cabinets and drawers need a smart order too. Vacuum crumbs first, then wipe the interiors. If you wipe first, those loose crumbs turn into a smeared mess. Also clean the tops of upper cabinets, where grease and dust tend to pile up.
| Area | Required Task | Inspection Focus | Estimated Time |
|---|---|---|---|
| Oven & Range | Scrub interior, racks, and broiler; degrease hood and filter | Burnt-on food, grease buildup, clear filters | 45–90 mins |
| Refrigerator | Wipe all shelves, drawers, and door gaskets; clean behind/under | Food residue, spills, and mold in seals | 30–60 mins |
| Microwave | Scrub interior ceiling and turntable; wipe vents | Food splatters and odors | 10–15 mins |
| Dishwasher | Clean the filter and wipe down rubber seals | Debris in filter and mold on seals | 15–20 mins |
| Cabinets & Drawers | Vacuum crumbs; wipe interior shelves and exterior faces/tops | Sticky residue, crumbs, and grease on tops | 45–60 mins |
| Sink & Counters | Scrub basin and descale faucet; sanitize backsplash | Water spots, mineral deposits, and grout stains | 20–30 mins |
| Kitchen Floor | Sweep and mop, including under accessible appliances | Sticky spots and debris in corners | 20–30 mins |
Before your walkthrough, run the garbage disposal with ice and lemon to help remove odors [1][4]. Then move on to the bathroom before dust and residue spread.
Bathrooms: Tub, Toilet, Vanity, Mirror, and Vent
Bathrooms are another common source of deposit deductions. Mold or mildew on caulk and grout can cost $75–$200 [2]. In many cases, it comes off with a bleach-based cleaner left to sit for 10 minutes before scrubbing [5].
Scrub grout lines with a stiff brush. For soap scum on the tub and shower walls, use a bathroom cleaner made for that job. If the showerhead has mineral buildup, soak it in white vinegar to loosen it up.
Pay extra attention to the base of the toilet and the area directly behind it. These spots get close scrutiny and are easy to miss [1][4]. Wipe the toilet tank, handle, and all outside surfaces, not just the bowl.
Finish the rest of the room in the same careful way. Clean the vanity, faucet, and mirror. Descale the faucet if you see mineral buildup. Wipe the medicine cabinet inside and out. Remove the exhaust fan cover and clean off the dust. Mop the floor last, making sure to get into corners and behind the toilet. Before the walkthrough, dry the bathroom fully.
Living Areas, Bedrooms, Closets, and Entryways
These rooms usually feel easier, but they have plenty of small spots that show up on inspection reports. Start high and work your way down. Wipe ceiling fan blades with an old pillowcase slipped over each blade so the dust stays inside instead of flying around [6]. Then clean air vent covers, followed by window tracks, blinds, baseboards, and the tops of door frames.
Light switches and door handles need attention too. They collect fingerprints and scuffs fast. A magic eraser can help with marks, but don’t soak the wall surface [5].
Vacuum carpets well. If your lease says you need professional carpet cleaning and a receipt, set that up before the walkthrough [3]. Dirty carpets can lead to $100–$300 or more in deductions [2].
For closets, remove everything, take out shelf liners, wipe rods and shelves, and sweep or vacuum the floor, including the corners. At the entryway, sweep the threshold so grit and debris don’t get flagged during inspection.
After the last room is clean, do a final walkthrough and photograph the unit.
Final Walk-Through and Move-Out Documentation
After cleaning, do one last walkthrough in daylight so you can spot dirt, smudges, and scuffs that are easy to miss at night [1]. Once the cleaning is done, shift into inspection mode. Walk through the unit the way a landlord would. Open every cabinet and drawer. Check inside each appliance. Pull doors all the way open so you can look behind them. Test every light switch, run every faucet, and flush every toilet.
This is also the time to handle the small stuff that can still cost you money. Replace burnt-out bulbs. Gather all keys, parking passes, garage remotes, and pool or gym fobs. If your rental has a patio, balcony, or garage, give that space a sweep too [1][2][3].
Last Inspection Checklist Before You Hand Over the Keys
Use this final pass to make sure nothing got missed.
| Room | Verification |
|---|---|
| Kitchen | Cleaned appliances, cabinet interiors, and areas behind/under movable units |
| Bathrooms | Grout/caulk scrubbed, toilet base cleaned, exhaust fan cover wiped, medicine cabinet emptied |
| Living/Bedrooms | Baseboards wiped, ceiling fans dusted, window tracks cleaned, closet interiors wiped |
| General Interior | Light switches/outlet covers wiped, HVAC vents dusted, wall marks spot-cleaned, doors cleaned both sides |
| Outdoor/Misc. | Patio/balcony swept, garage oil stains removed, all trash and personal items cleared, keys and remotes gathered |
Before you leave, ask the landlord for a joint walkthrough and get a signed condition report [1][2]. If they say no, put that refusal in writing.
Photos, Videos, and Records to Keep After Move-Out
Once the unit passes your own walkthrough, document the condition right away. Take timestamped photos and a short video of every room and appliance after cleaning. That includes the inside of the oven, refrigerator, microwave, dishwasher, cabinets, closets, floors, and baseboards [1][2][3].
A short video walkthrough gives you backup if there’s any dispute later. Email the photos to your landlord right away so there’s a dated record showing the unit’s condition when you left [3].
Keep all your move-out records in one file, including:
- Your original lease
- Move-in inspection notes
- Move-in photos for comparison
- Receipts for cleaning supplies or professional cleaning services [1][2][3]
If you hired a cleaning company, save the itemized receipt and the completed checklist. And before you leave, make sure they have your forwarding address.
Conclusion: A Room-by-Room Checklist to Help Get Your Deposit Back
Getting your deposit back usually comes down to four things: review your lease, take care of small repairs, clean each room well, and document the unit when you’re done.
Start with the kitchen and bathrooms. Those rooms tend to cause the most problems, so it makes sense to finish them first and then document the results.
If you’d rather have someone handle the final clean, NLZ Cleaning Long Island can do that for you. NLZ Cleaning Long Island offers move-out cleaning in Nassau County, including appliance and cabinet cleaning. Cleanings are done by vetted, bonded professionals.
Once the cleaning is finished, shift to documentation. Whether you do the work yourself or bring in help, follow a top-to-bottom, room-by-room process. Before you hand over the keys, take timestamped photos, record a short video, and complete a signed landlord walkthrough.
FAQs
What counts as normal wear and tear?
Normal wear and tear is the kind of aging that happens from day-to-day living, not from carelessness or misuse. Think faded paint, small scuffs on the walls, tiny nail holes, worn carpet in busy spots, and light scratches on floors or countertops.
In New York, landlords generally can’t charge you for those kinds of issues. But heavy dirt buildup, badly stained carpets, large holes in the walls, or broken fixtures usually count as damage, which is generally on you.
Should I hire a professional move-out cleaner?
Hiring a professional move-out cleaner can be a smart call if time is tight, the move is wearing you down, or your landlord has high standards and you want to give yourself a better shot at getting your security deposit back. It can help even more with larger homes, older places with built-up grime, or rentals where the deposit is a big chunk of money.
In Nassau County, NY, NLZ Cleaning Long Island offers vetted, bonded pros, flat-rate pricing based on bedrooms and bathrooms, and a 200% satisfaction guarantee.
What proof should I keep for a deposit dispute?
Keep your paperwork and proof in order in case your security deposit gets challenged.
A few things can make a big difference:
- Timestamped photos and videos of every room after cleaning, including appliances, cabinets, and closets
- Emailed copies sent to yourself so you have a verifiable digital record
- Receipts for any professional cleaning services
- A signed agreement from a joint pre-move-out inspection with your landlord